Pencil Coloring on Patterned Paper
- varadasharma
- Jun 23, 2019
- 2 min read
Hi friends, I am sure all of you know that the amazingly talented Kathy from The Daily Marker has her next 30-days-coloring-challenge. I am not able to keep up every day (adulting, what else?!!), but I have been doing a little bit of what I can every single day.

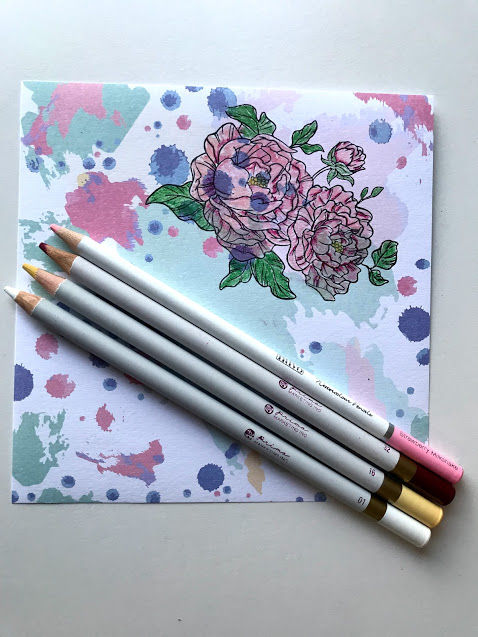
I started by stamping the large flower bouquet from Fun Stampers Journey Peony Bloom stamp set with Archival Black ink on one of the patterned papers from Spellbinders card kit. When stamping on patterned papers, here are somethings to keep in mind about choosing the paper itself.
Go for colors that work well with what you have in mind for coloring your image. Colors that don’t overpower your coloring, but compliment it instead. Since I was going to color my flower in pink, I chose a patterned paper that had light pink and blue splashes. Kinda like a watercolor background I’d create myself.
Choose patterns that are subtle and understated. That way the background will not take all the attention. Also, for a fun effect, pick graphic or geometric patterns if you are planning to stamp florals. Pick floral patterns if you are planning to color in a image that is more geometric. I will make more examples of these in upcoming posts, so stay tuned :-)
Monochrome or tone on tone colors would work well provided the colors are not too saturated themselves.
It helps to decide on coloring medium up front so that you can choose the weight of the paper itself. A thinner paper (like I used here), works great for dry mediums like colored pencils. But if you are planning to use wet mediums like watercolors or even alcohol inks, it’s best to have a thicker paper.
Once I had stamped my image, I picked the colors of pencils. I chose one from Nuvo pencils and the rest from Prima Marketing. The Nuvo pencil is in fact a watercolor pencil, but I used it dry – without any water for this project. Yes, it is okay to mix and match mediums and use these in different ways. You don’t always have to follow-these-rules :-)

Once I had everything colored, I used one of the fancy edged ovals to cut it out and also cut out just the outer edge of the same oval using black cardstock. I felt the black ring was too thick, so trimmed it using the inner stitched edge as my guide and adhered the two together. I also stamped my sentiment “for you” in matching Archival Black ink.
For my cardbase, I used one of the kraft cardstock ones and dry embossed it using Inspire embossing folder from Fun Stampers Journey. Then I foam mounted my colored oval panel on top and added some sequins in matching colors to finish it off.
Hope you like this idea and feel inspired to create something like this.
SUPPLIES LIST
For your convenience, I am sharing links to the supplies I’ve used or the ones you can use for making similar cards – click on the picture or link to go directly to the product. Wherever available, I have used affiliate links, which means when you make a purchase, I receive a small commission (at no extra cost to you) which I use to run this blog. I truly appreciate your support!
Hugs! ~Varada


Comments